Sorting Your Portfolio
From the Sort By drop down list, you can sort your uploaded media by the following:
Title: The title entered for the image (A to Z or Z to A)
Image Price: The value entered when uploading the image. Only applicable to artwork image uploads. (Low to High or High to Low)
Year Created: The year entered when uploading the image. Only applicable to artwork image uploads. (Oldest to Newest or Newest to Oldest)
Date Uploaded: The date the media was uploaded to ZAPP. (Oldest to Newest or Newest to Oldest)
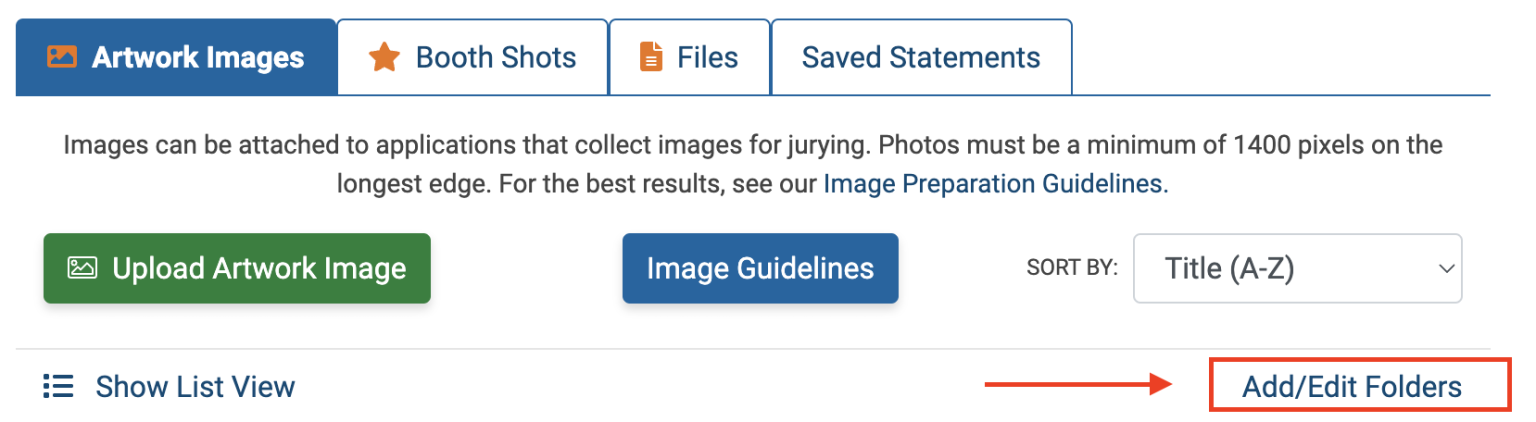
Adding, Editing, and Deleting a Folder
Click Add/Edit Folders.
Click Add Folder. Enter a folder name (e.g., 2025 images), select a Parent Folder if you would like to place the new folder inside another, and click Save.
To modify the folder name or parent folder, click Edit. Update your information and click Save.
To delete a folder, click “Delete.” Then select to either:
Delete Folder But Preserve Contents – This will remove only the folder but not the items in it.
Delete Folder and Contents – This will delete the folder and all contents inside. This action cannot be undone.
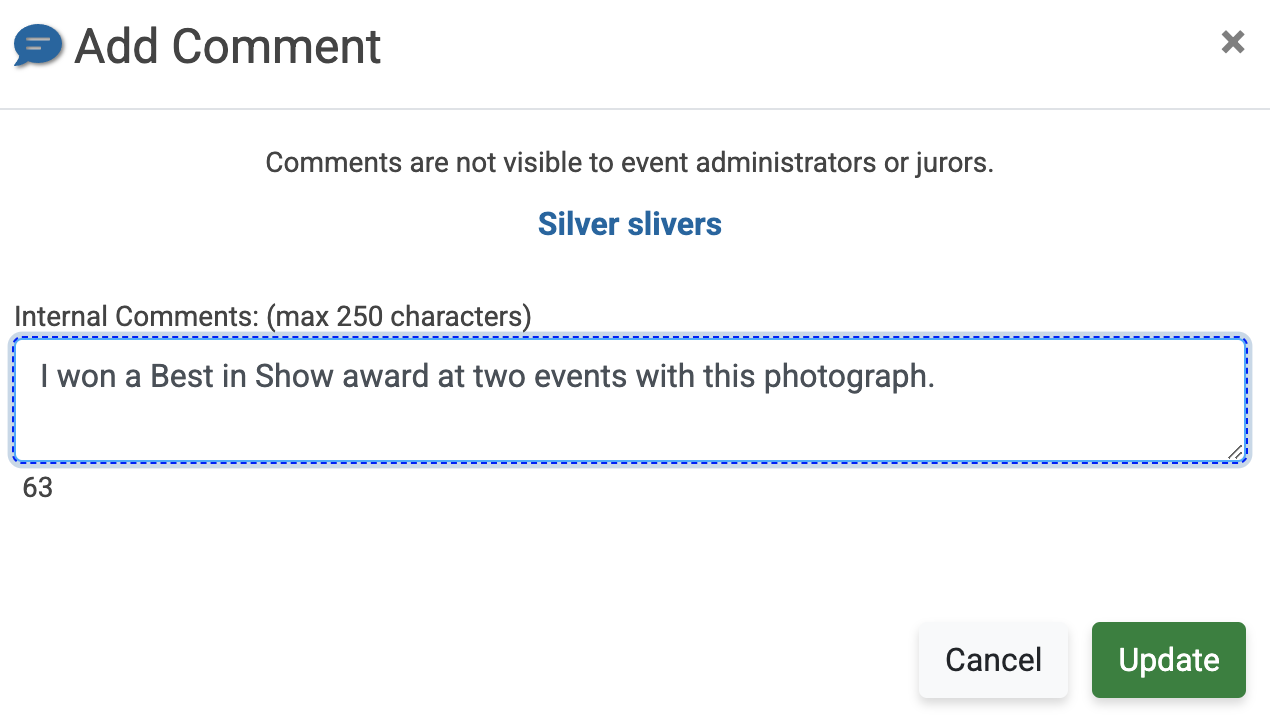
Adding Tags and Comments:
Select the thumbnail of any uploaded media file and then click Edit.
Create a tag by entering 1-12 alphanumeric characters without spaces. Click Add.
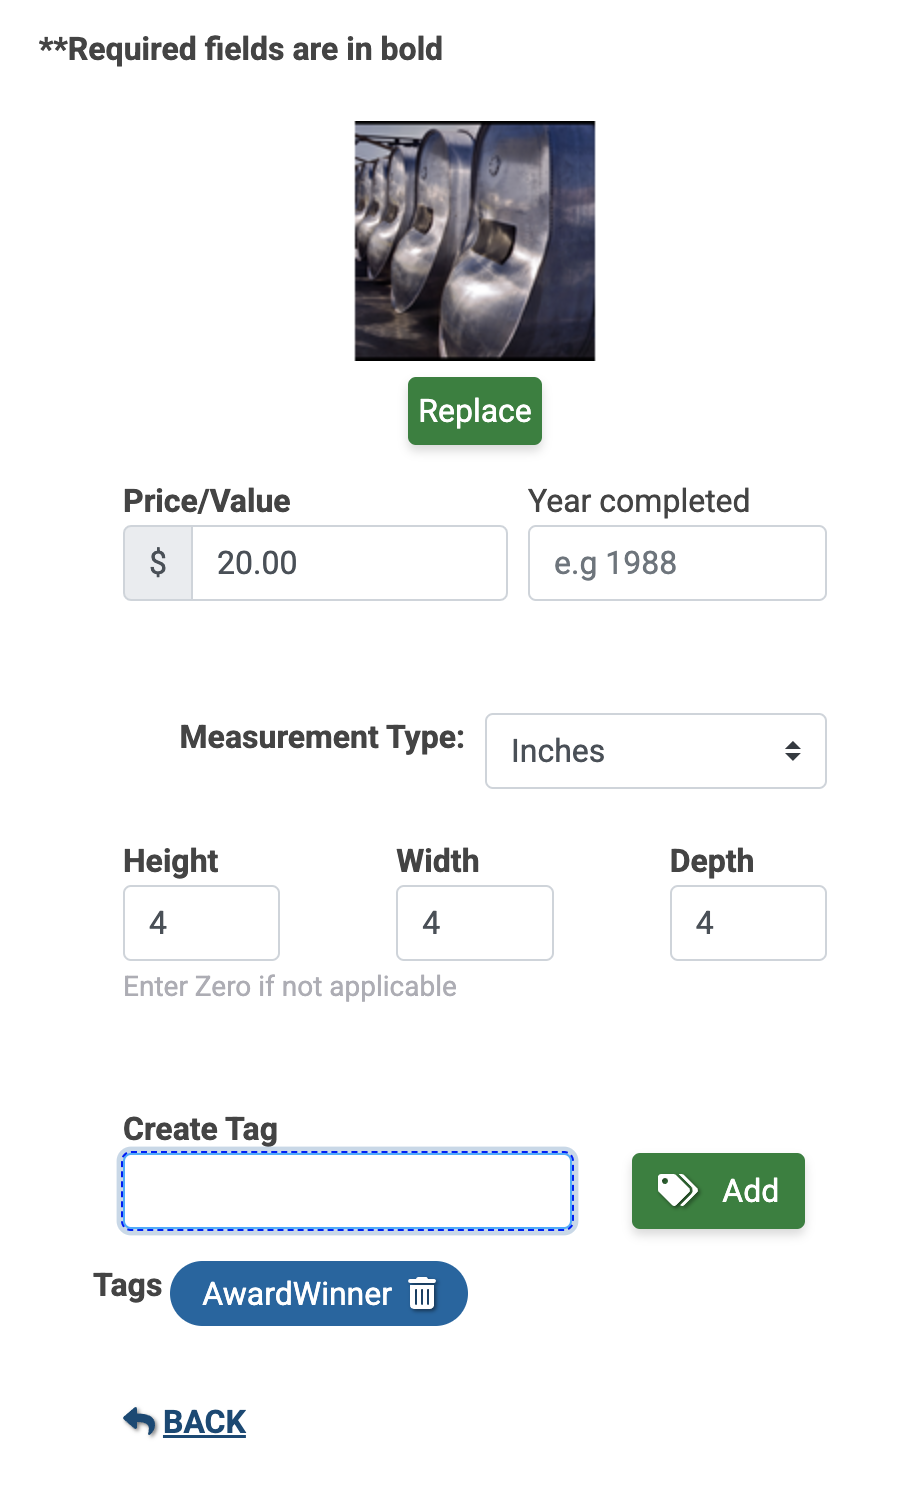
Click Add Comment. Enter up to 250 characters and click Update.
Click the green submit button to save your changes.